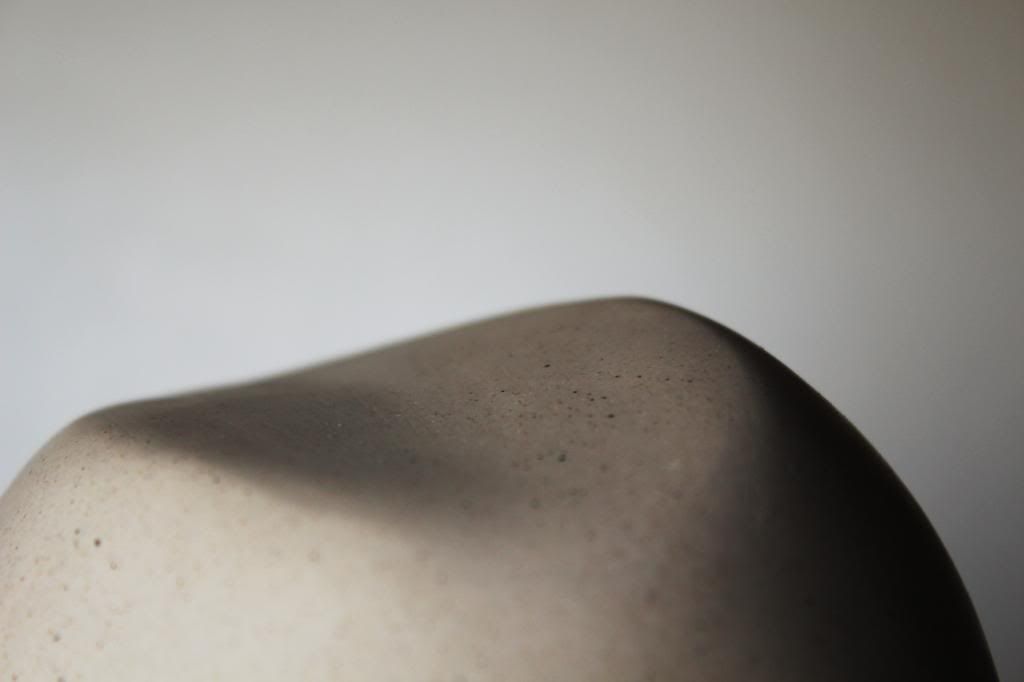
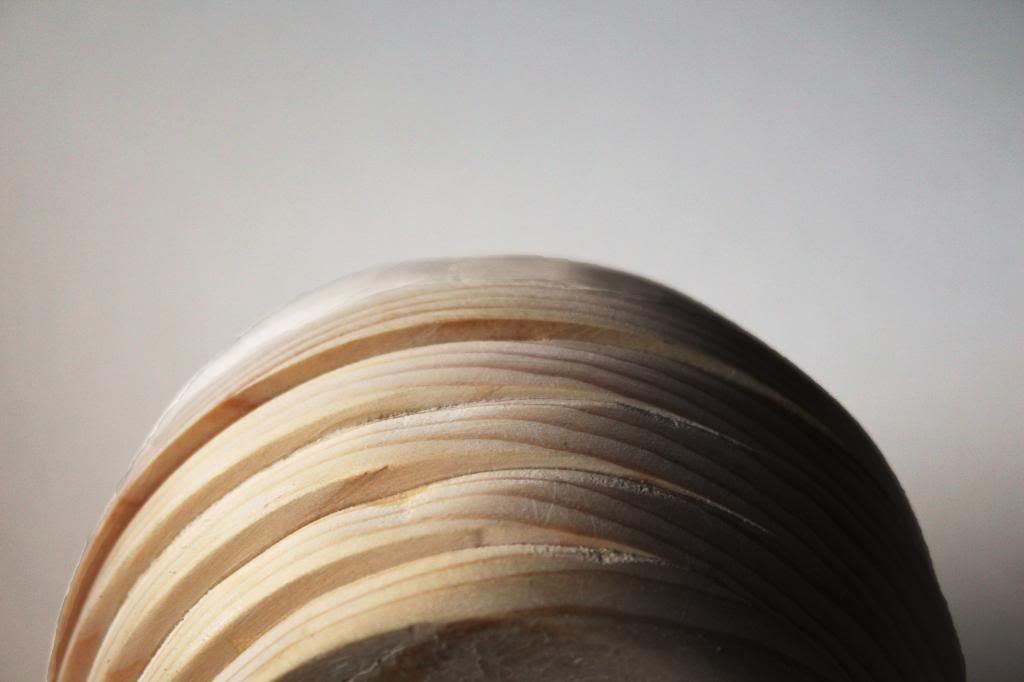
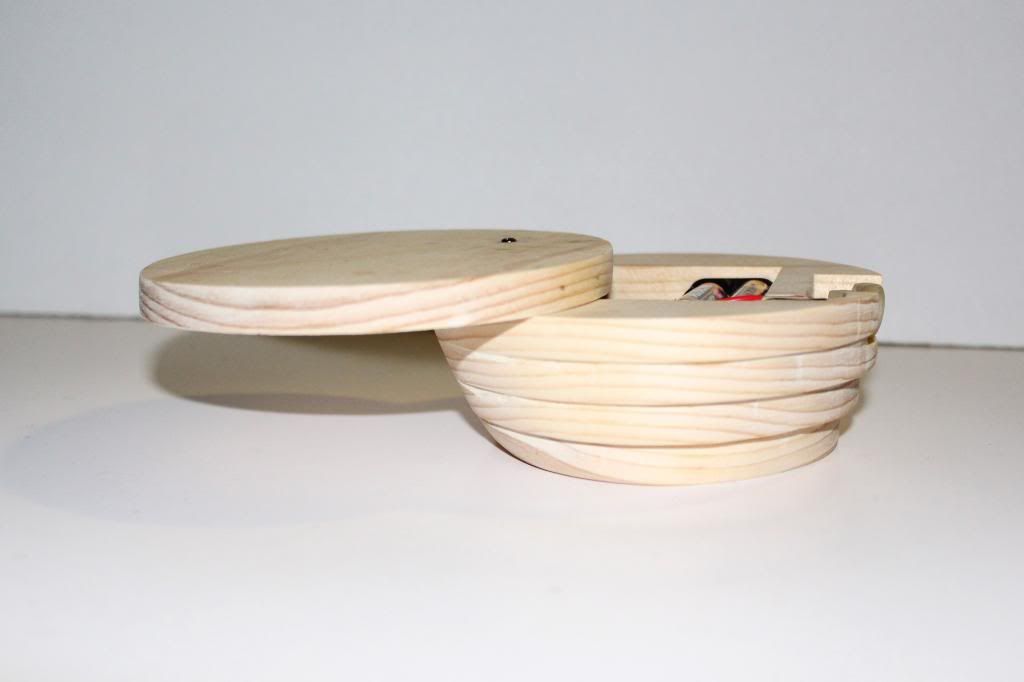
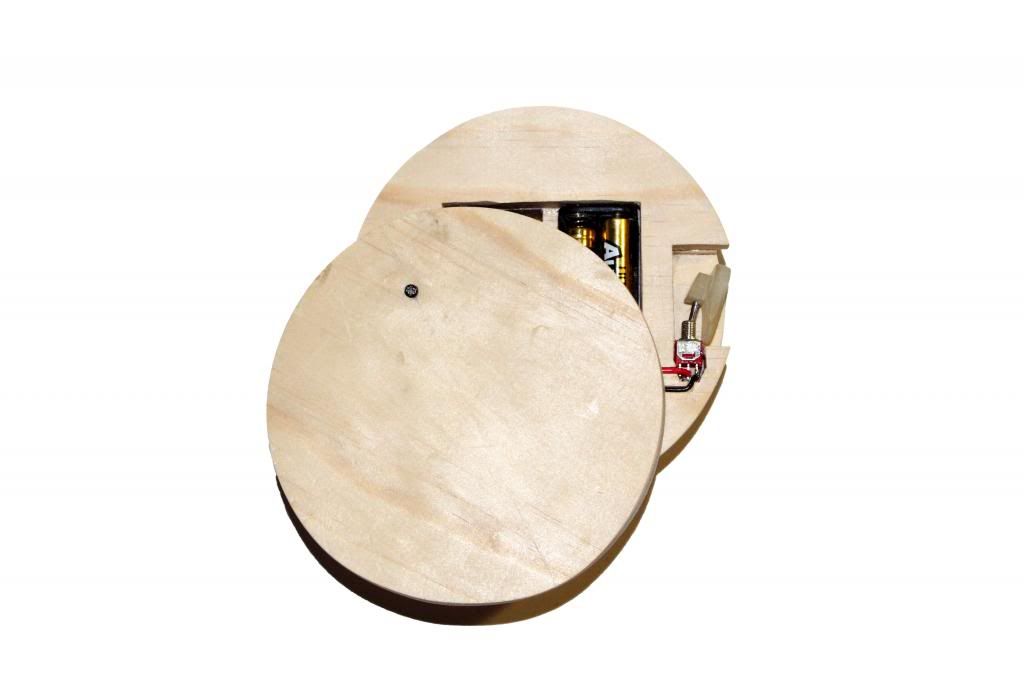
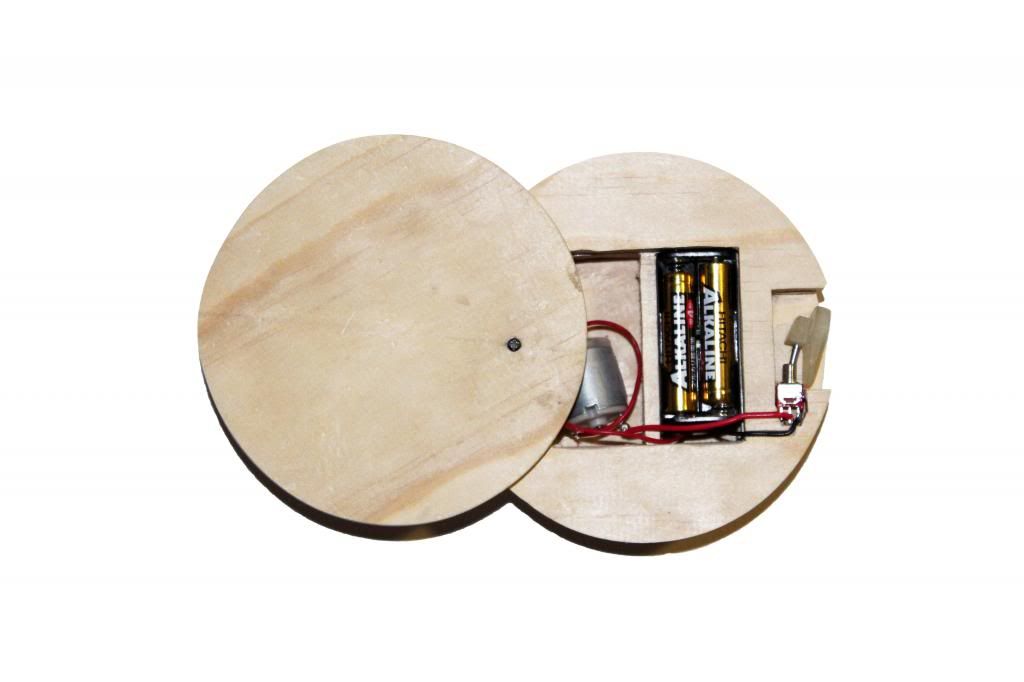
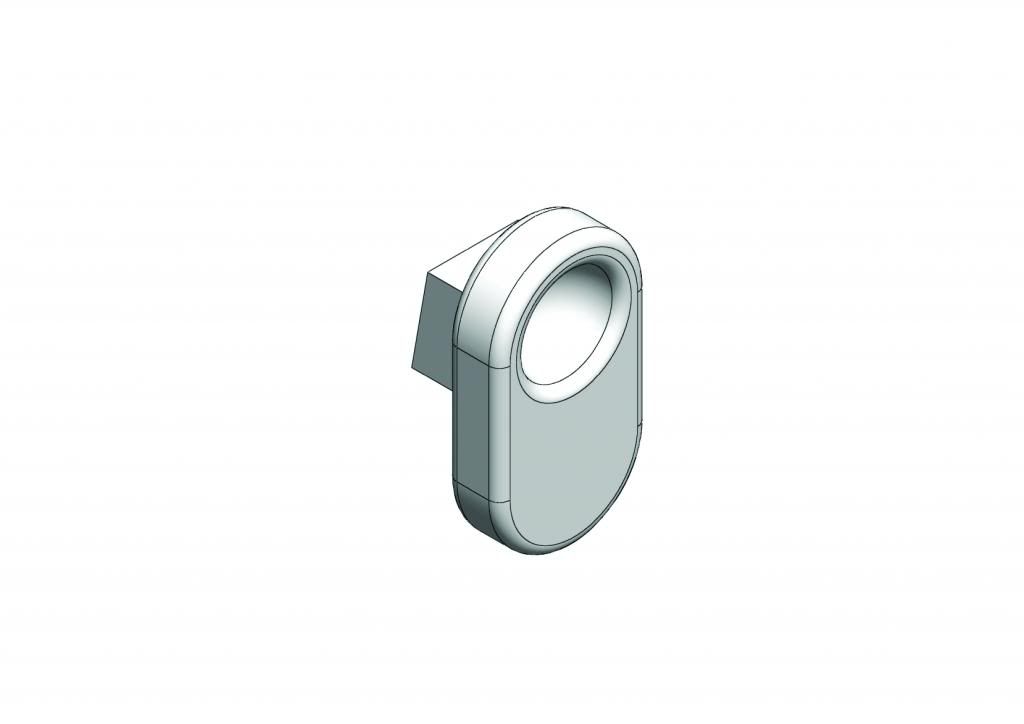
The guiding emotion I chose for this project was joy, and I focused more specifically on the idea of sharing joy. When we are happy, the natural way for us to show that is through physical contact. With this idea guiding my process, I created a model that is very curvilinear, paying much attention to the craft in terms of fabricating an object that not only looks inviting to touch but is also pleasant upon contact. The object also sits very comfortably in two hands, guiding the person interacting with it to cup it in their hands, almost cuddling it, further adding to the emotion of joy. Plaster and wood (pine) was chosen because they are strong but with certain softness to it. I find that together, they exude a sense of peacefulness. For the sound, my main idea was to remove the consistent, steady rhythm from the motor, so that a more musical quality can be produced. I used a string that provides flexibility to the moving bells, and also covered two out of the four interior surfaces that the bells would come into contact to with copper, so it produces a variation in sound. A dowel was used to allow the top part of the object to pivot, revealing the interior compartments. This connection was used because the movement created nicely echoes the overall form.
Through this project, I learnt that I like to clearly plan every step of my fabrication process on paper before physically creating it. While it might not be a bad thing, because the process helps to knock out a couple problems and let me know if my ideas are practical or not, experimentation is also equally important. There are unforeseen problems that will only surface though physical creation
Labels: dsdn141

Added extra details of how I envisioned the object to be held and interacted with.
Labels: dsdn141
(Lost the photos of the sound components)
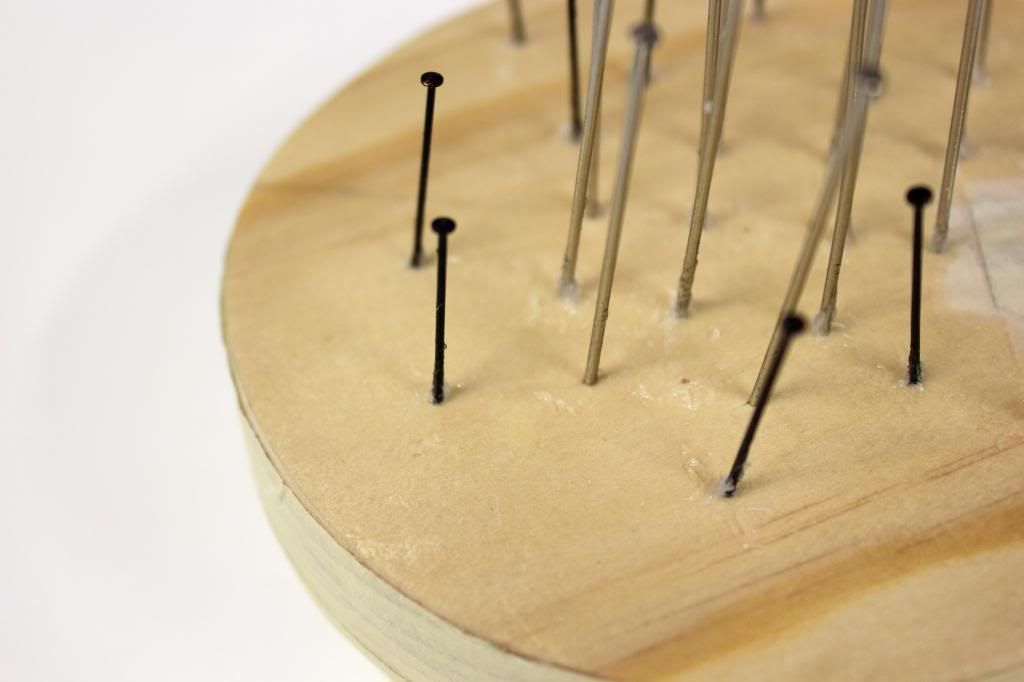
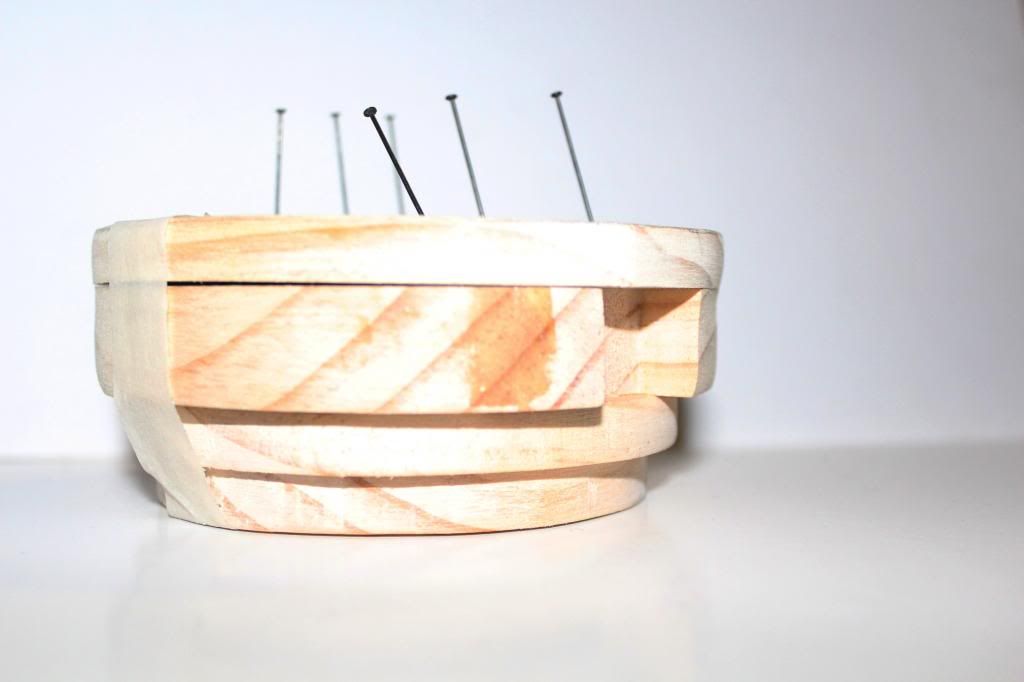
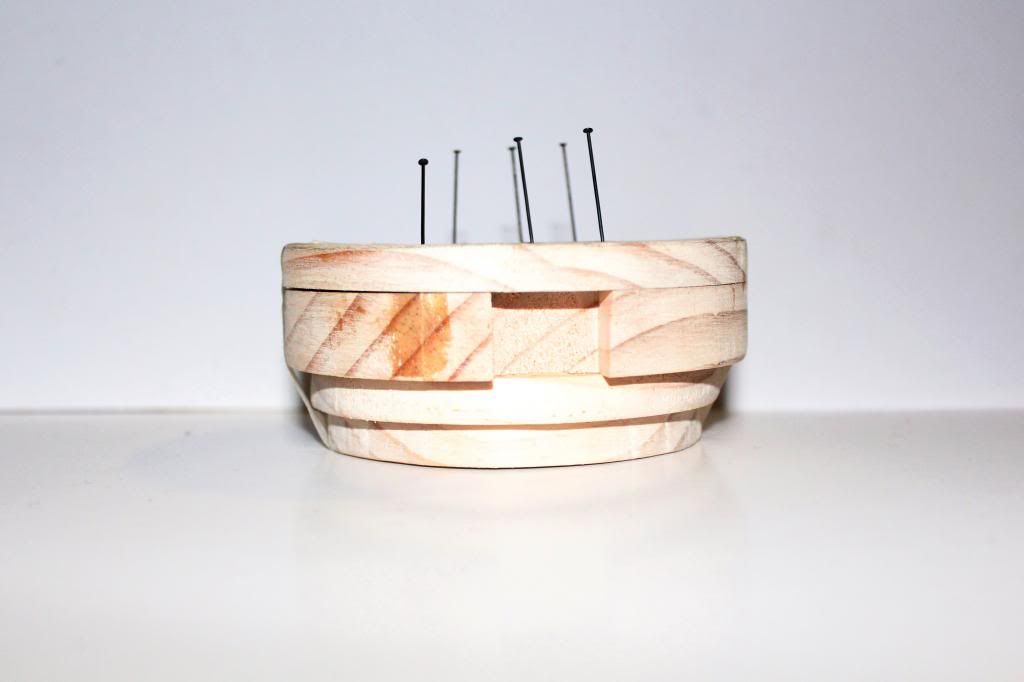
1. I attached three tiny bells ties together with fabric string onto the model. The fabric allowed for a more flexible movements so that the sound is less constant and more musical.
2. Connected a resistor to the circuit because the original speed of the motor was really fast and produced a sound similar to an alarm which was more scary and slightly irritating as oppose to joyful.
3. The bells knock against four surfaces when spinning. I covered two out of the fours surfaces with copper so that the bells hit different surfaces as it spins, producing more variation in sound.
Labels: dsdn141
Faced such a huge problem in terms of casting the plaster directly on the wooden base. Because pine is so soft and the surface I am casting on is relatively thin, the casting process caused the wood to bow terribly. I did some research and asked some people and found out that it is because a lot of water (the plaster top is pretty large) is entering one side of the wood, causing that side to expand and thus the piece to bow. I toyed with the idea of casting the plaster separately, but because of the nature of plaster, it is impossible to glue it onto anything. This problem almost forced me to abandon the entire idea and start from scratch.
Solved it by spraying the side that comes into contact with the plaster with enamel paint. The paint dries to a hard glossy finish, effectively waterproofing the surface of the wood. With no water entering the wood, it remains flat as it should be.
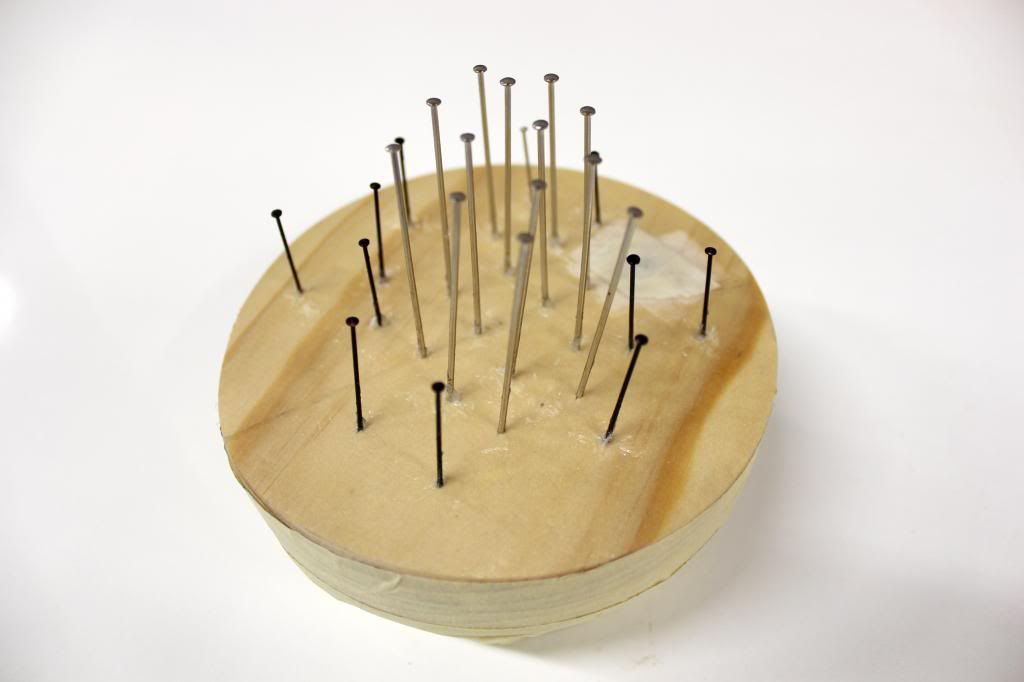
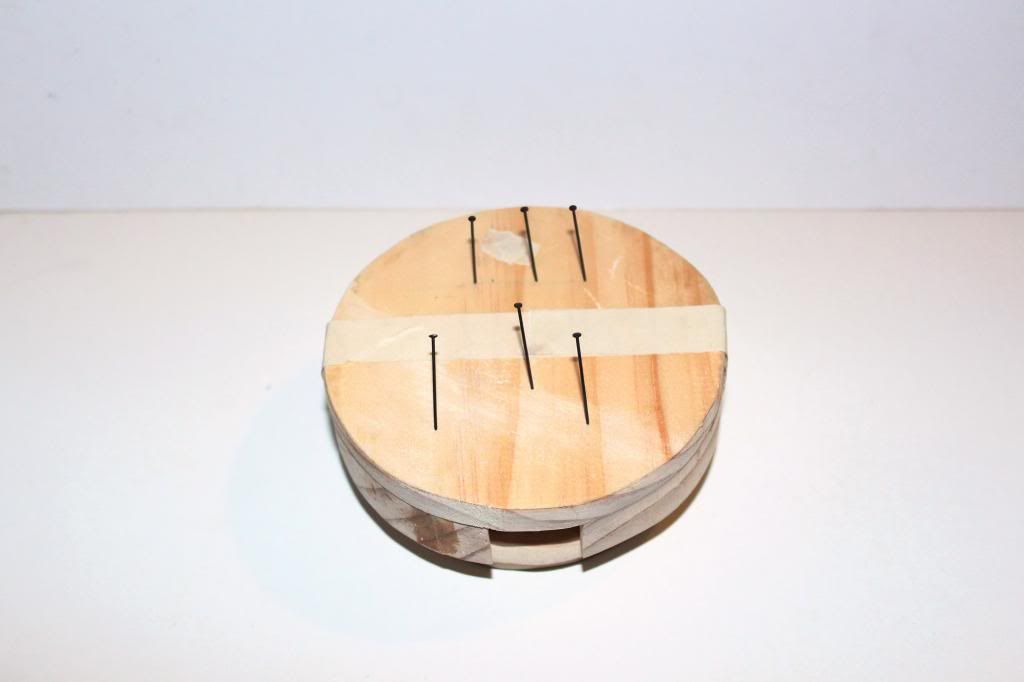
Quite a few nails were also put in, in varying heights and distances, so that when the plaster sets and cools down, it does not separate from the wood (happened with one of my failed models). However, the nails introduced pretty large holes on the surface which water can enter from, and the enamel paint was not able to seal the holes. I further coated them with generous amount of Vaseline, to seal the holes shut.
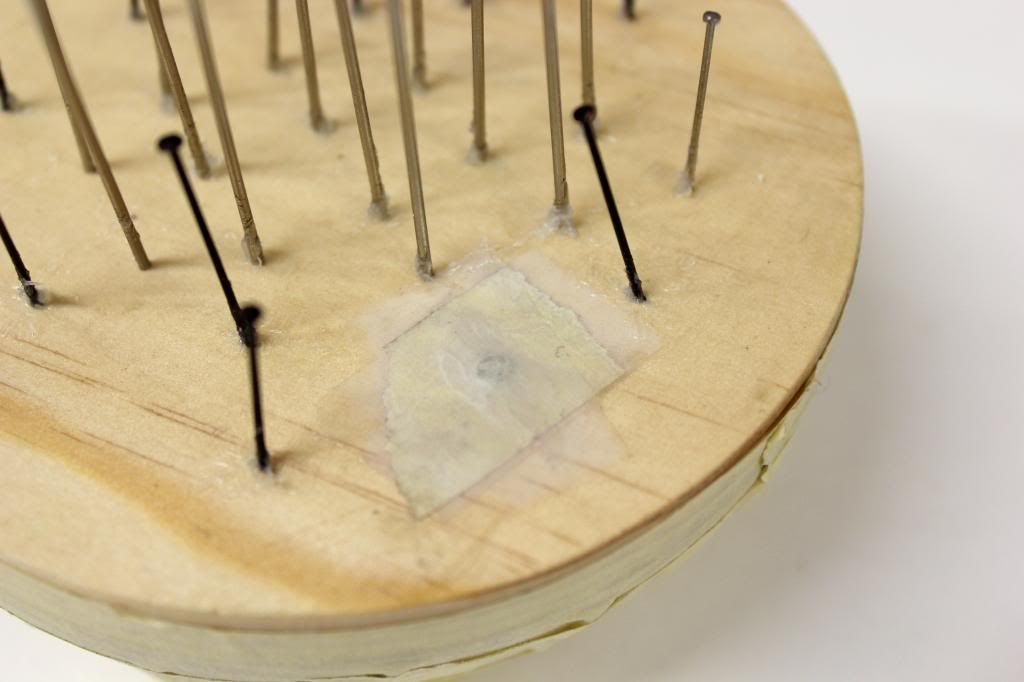
Also taped the top of the screw, if not, the plaster will set around the screw and the lid will not be able to pivot.
Labels: dsdn141
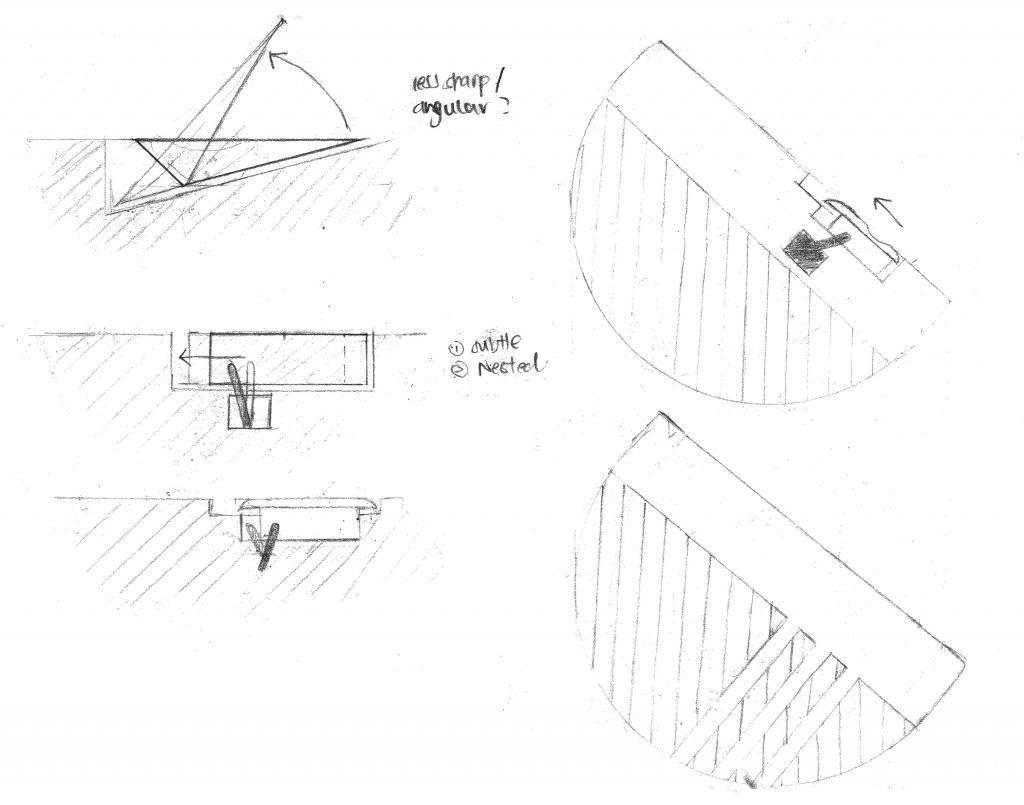
Found my first hurdle in crafting my object. Initially my idea was to use drill holes down one side for wooden dowels to pass though so that the lid of the base pivots. However, because the dowel is pretty thin (8mm diameter), it was impossible to use wood glue to hold in place the top of the dowel to the model. Even when the glue dries, because only a tiny surface is glued together, it just breaks apart again with the movement.
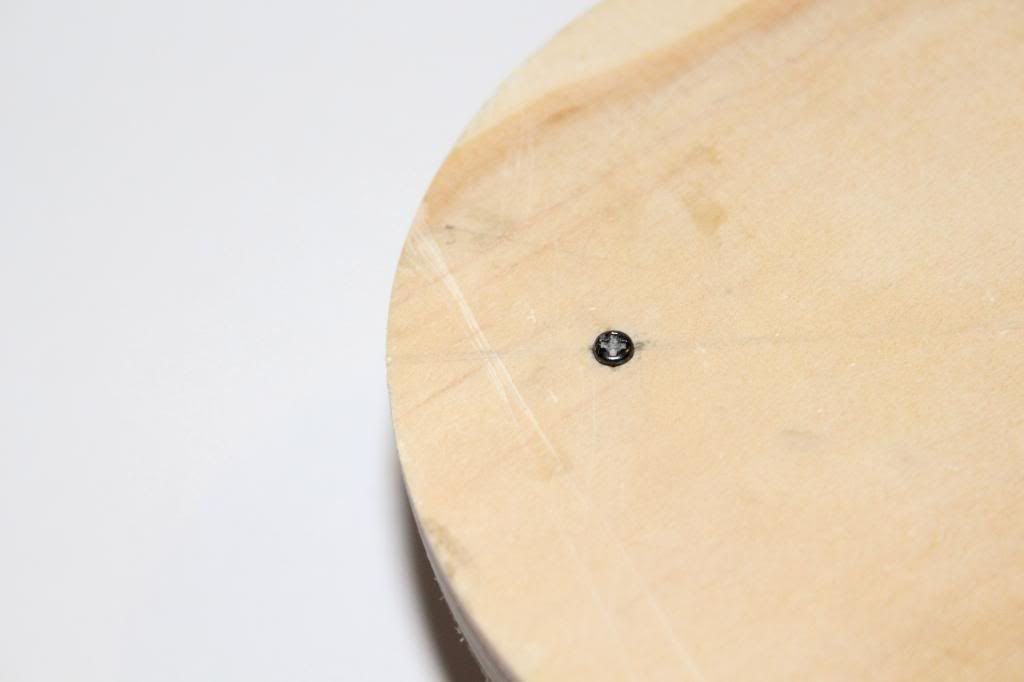
Solved it by using a small screw that passes through the lid and down the dowel. This held everything in place so much better, and even allow for more wiggle room, so the lid swivels really smoothly.
Labels: dsdn141
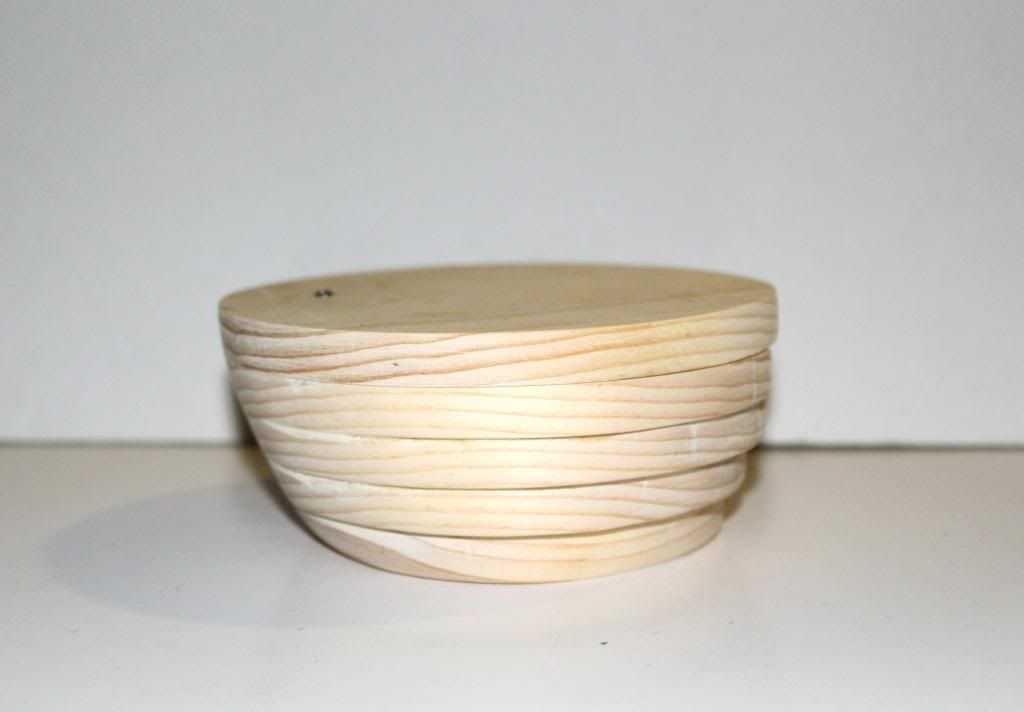
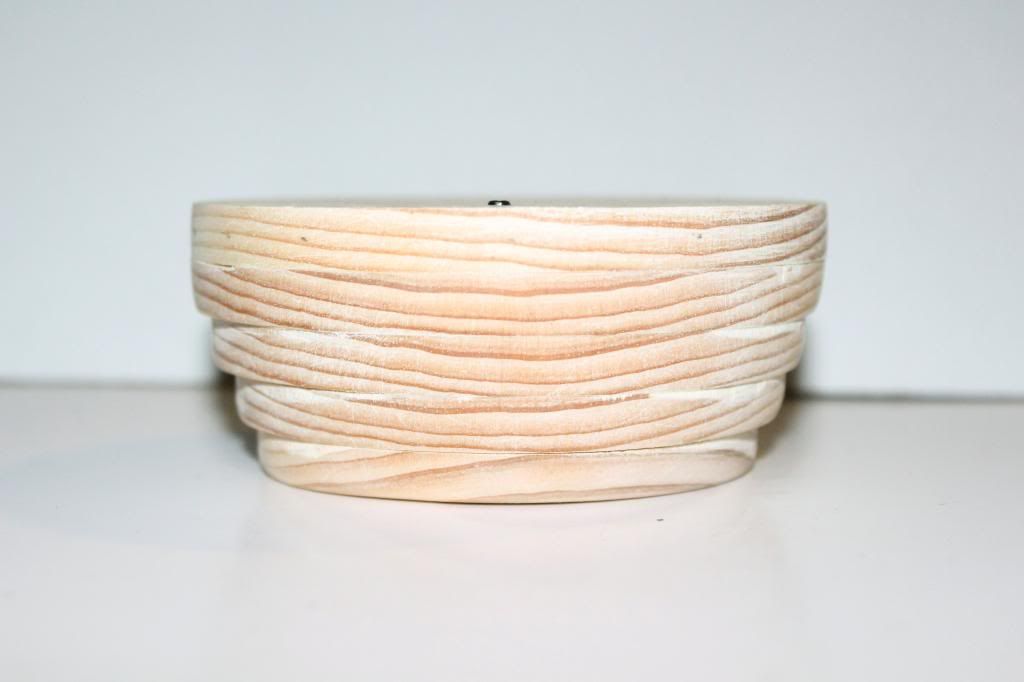
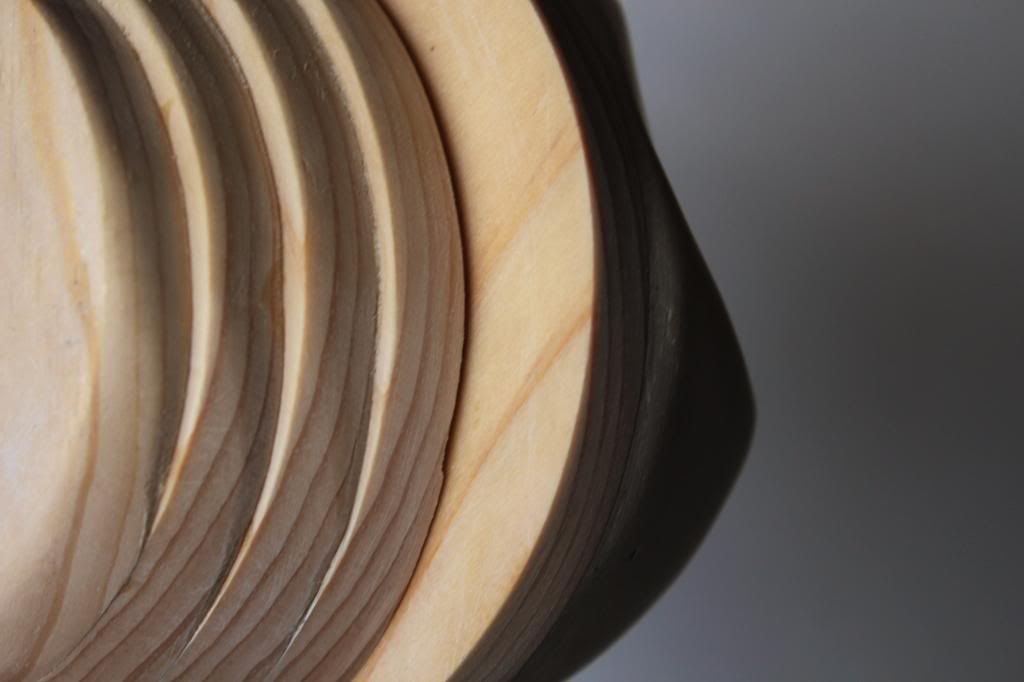
Managed to sand down one side of the base, which took me hours. Will keep the other side in steps, because I am further incorporating my idea of touch: the steps exists and naturally positions for the finger to grip, while the smooth round side will sit against the palm of the hand.
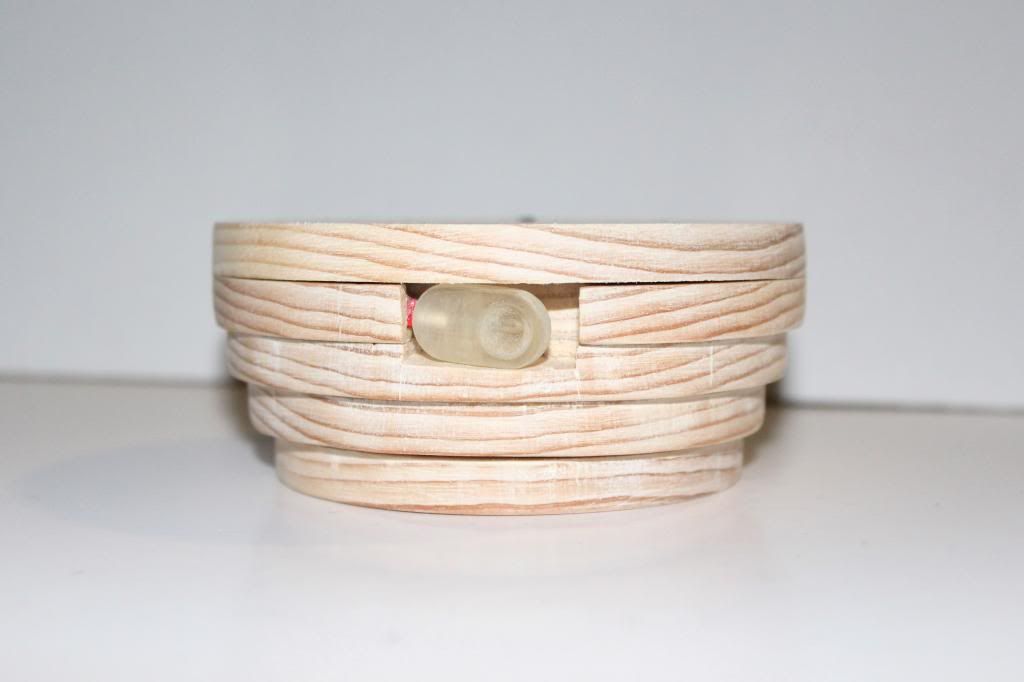
The switch is also in a position that is easily accessible, both on the table and once the object is held.
Labels: dsdn141
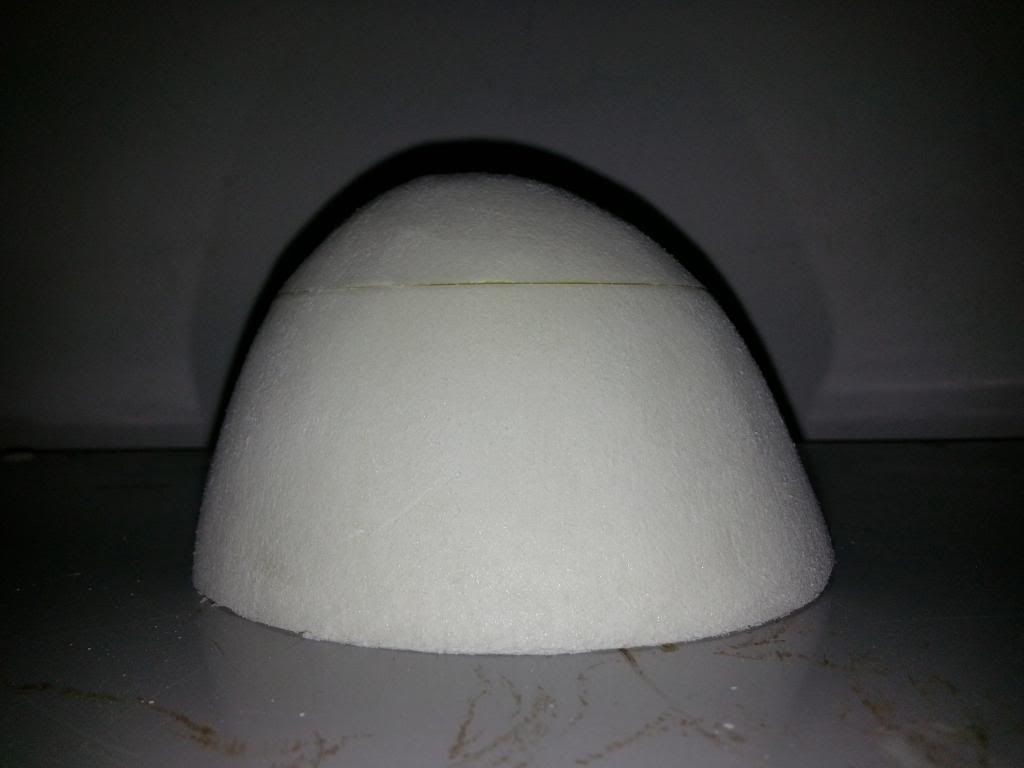
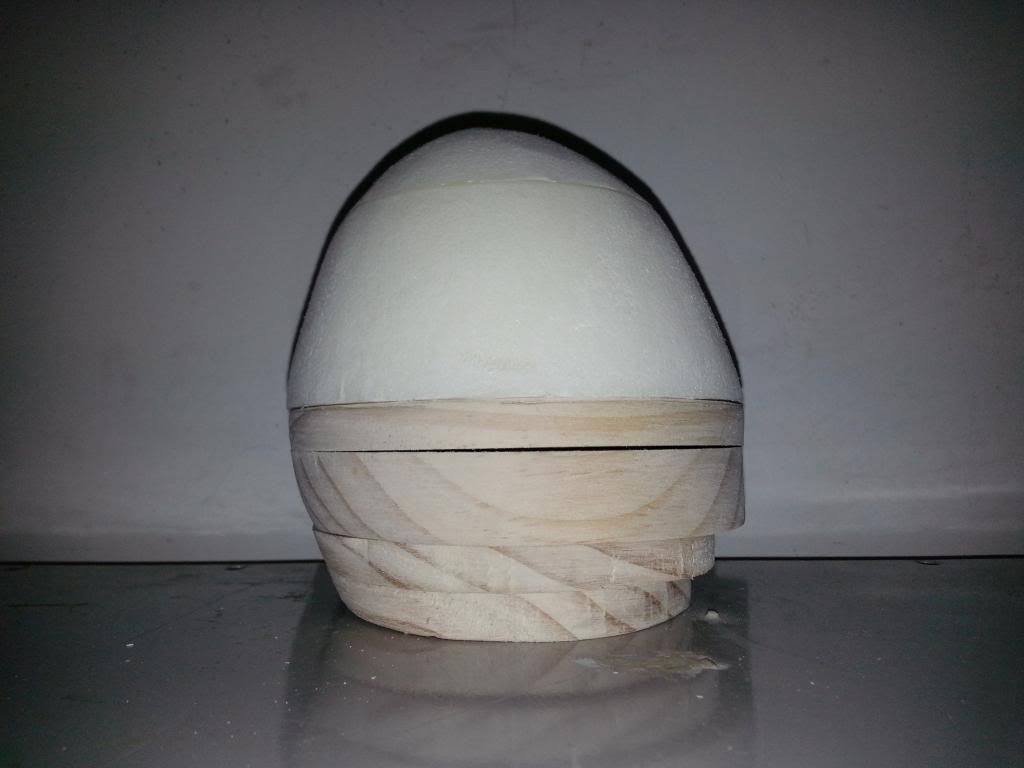
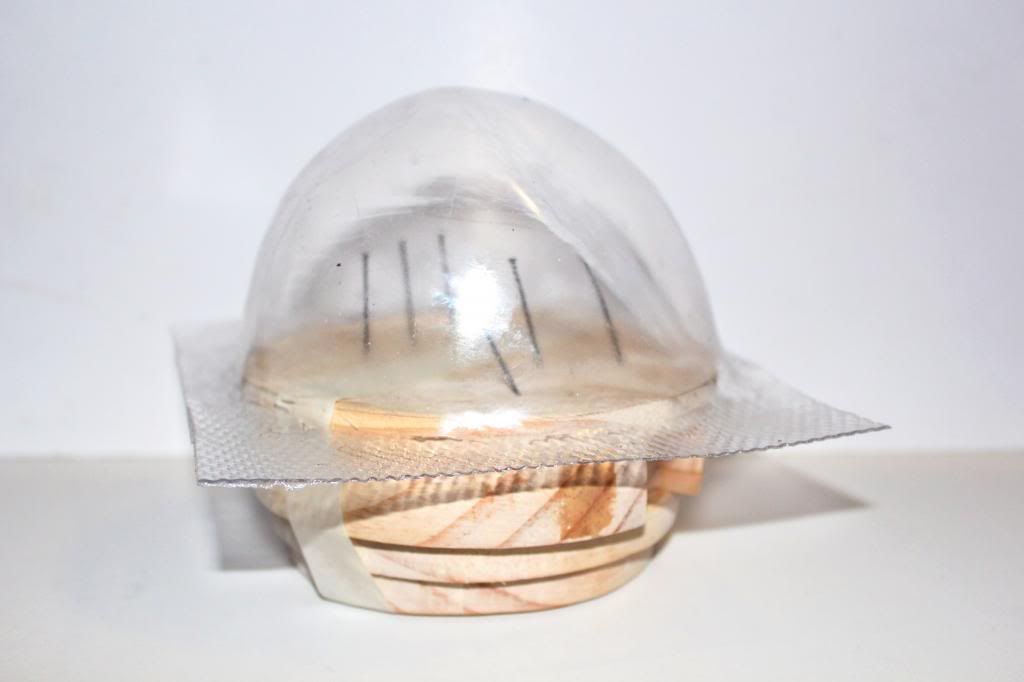
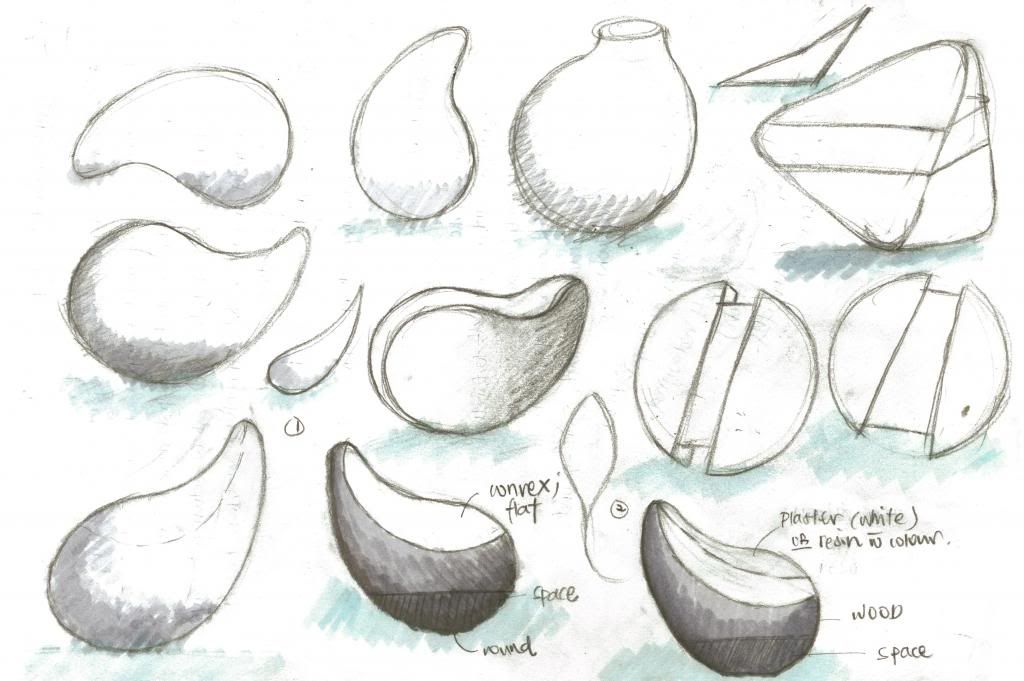
Shaped the top part of my model out of foam for vacuum forming. This portion will be casted in plaster.

Decided that the previous shape made the object looked too much like a bullet, I created a indentation on one side, to make the form more asymmetrical. The slight dent will also invite people to touch the surface to feel that subtle soft dip, hence linking back to my idea of sharing joy through touch. Will have to keep in mind make the surface really smooth and soft.
Made the base out of pine because it is really soft, allowing me to be able to sand down the steps on one side, continuing the curve from the plaster portion. Laminated the form rather than making it out of a single black of wood, because it is easier to cut out spaces for the electrical components.
Labels: dsdn141
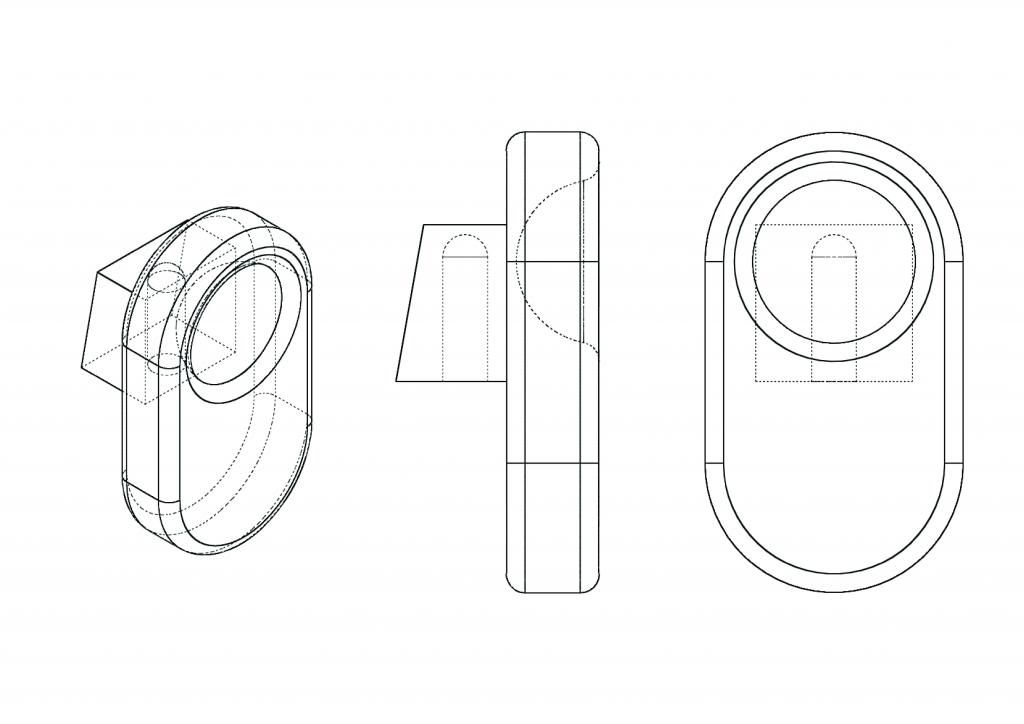
Kept the switch relatively round on all sides to keep with the overall shape of my object, also invites people to press it. There is a dimple on one side to signify the side to press for the 'on' position.
Labels: dsdn141
Continuing from the curvilinear form from my previous project, I decided that Joy would be the best emotion to guide me. I really want to evoke a softer and calmer kind of happiness, and the idea of sharing joy through touch. The switch will be nested, to keep with the fluid lines.
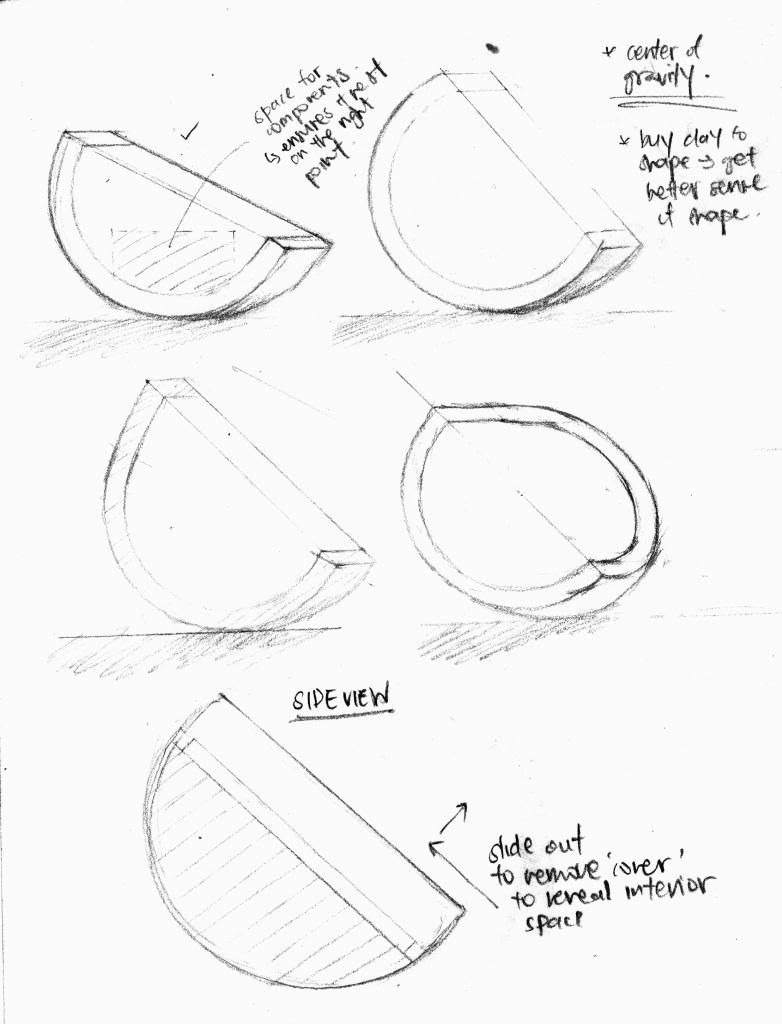
Also thinking about using a dowel to allow the object to open, revealing the interior space that houses the electrical components.
Labels: dsdn141
Labels: dsdn141
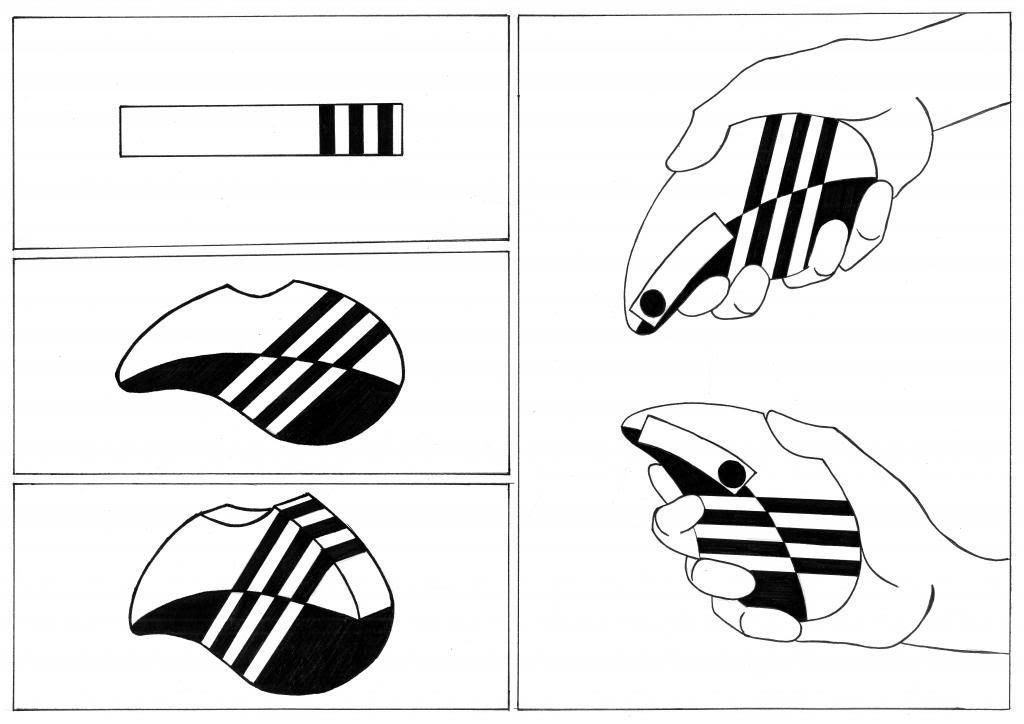
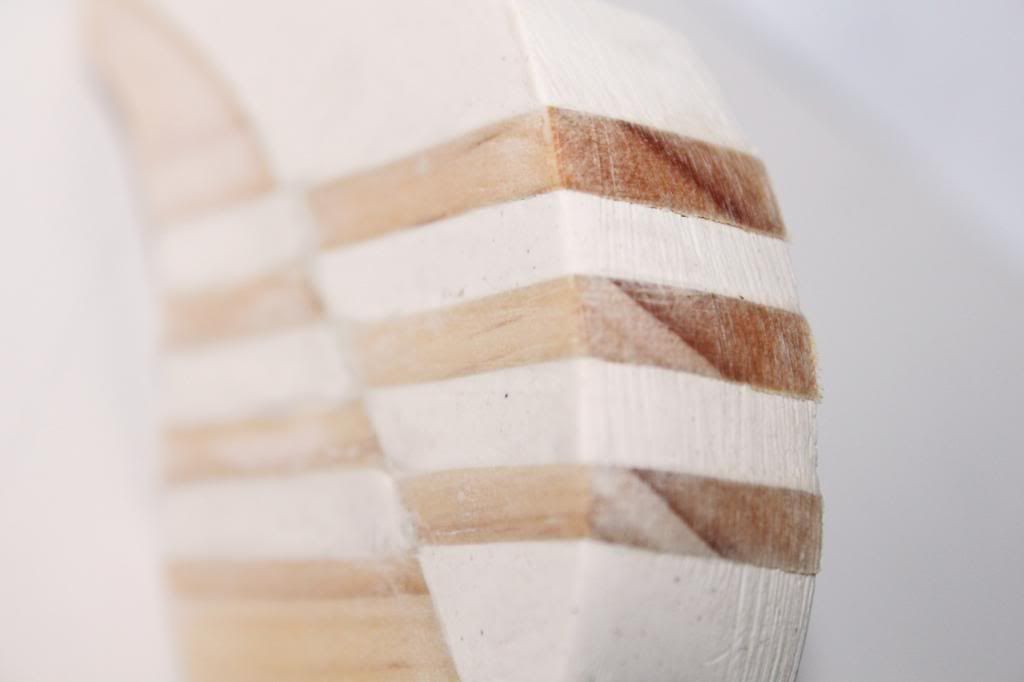
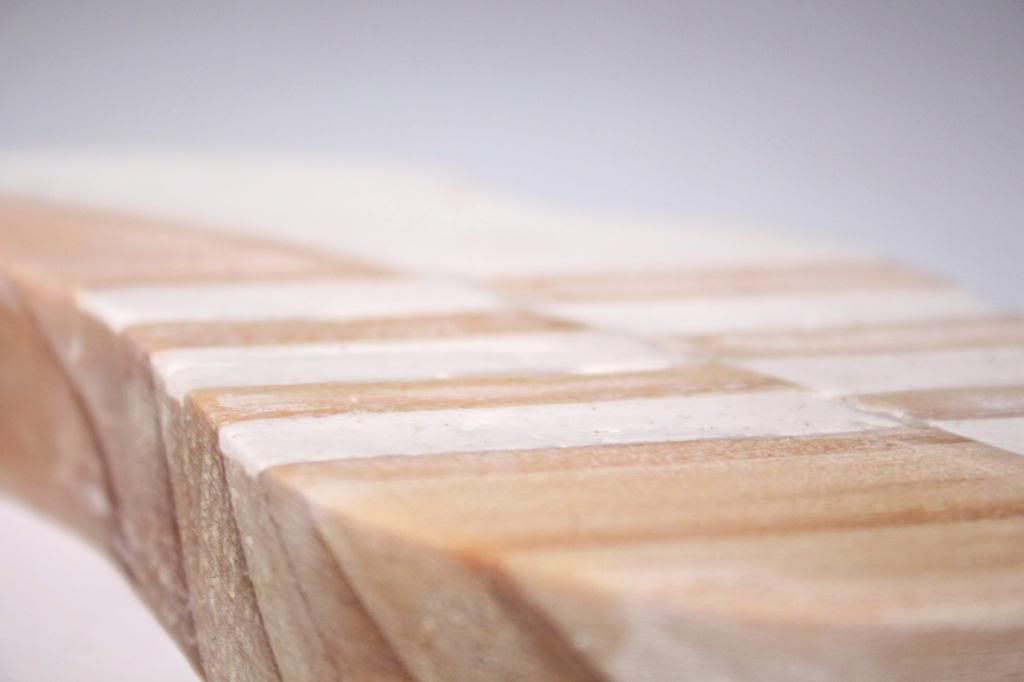
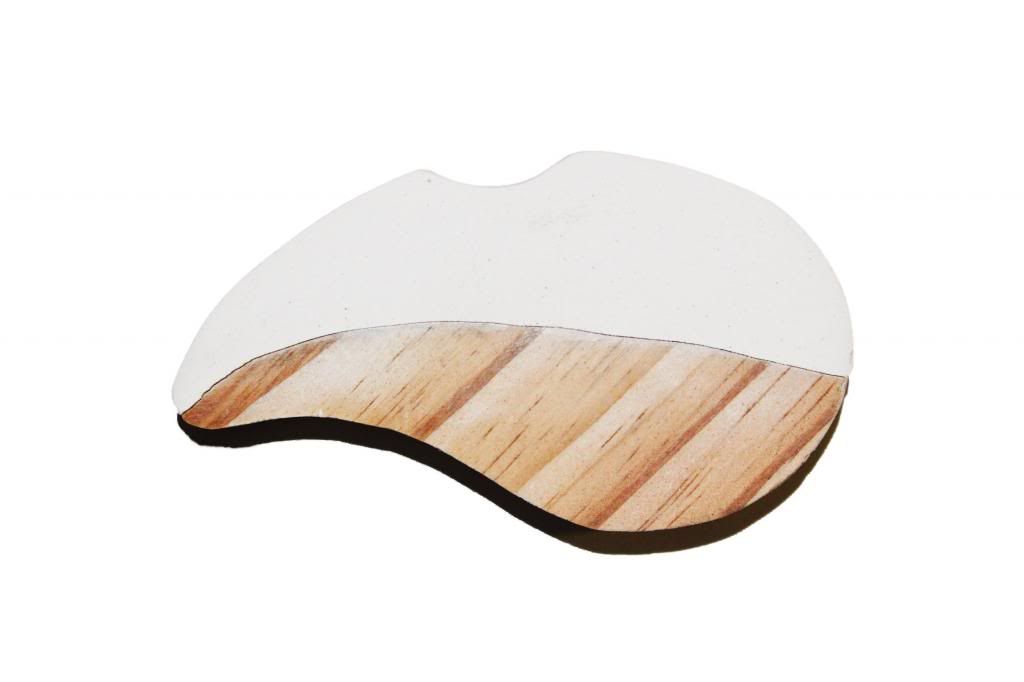
Project two has allowed me to learn a lot more about working with different materials and learning how they behave, especially in terms of the techniques to use to create a desired look. I combined pine wood and plaster in my object. Initially, I wanted to emphasize on the contrast between the two materials; wood being a warmer and softer materials compared to plaster which feels cold and hard. However, I moved to on focus on ways to bring those two materials together in a harmonious form despite the difference in emotions they evoke. The pattern running across the form where strips of materials have exchanged positions was used to integrate the two sides together as opposed to a sudden transition from one material to another. The shape of the object was made such that it would be instinctive in terms of how one would hold it and also how one would interact with it. Hence its shape not only fits nicely in a hand but also reflects the movement of the hand and the motion of the ball bearing in the object.
Labels: dsdn141
Labels: dsdn141
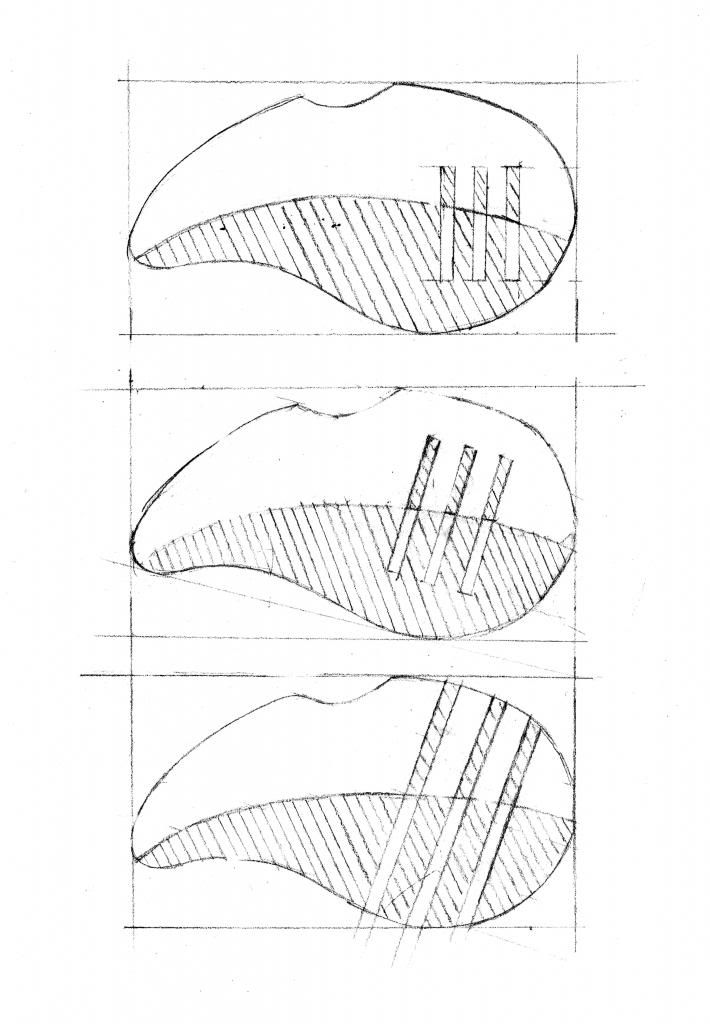
For this set of iterations, testing out the idea of:
1. Slanting the strips at an angle
2. Integrating the plaster better with the same method used for the wood.
 This idea is working better now. I like how the detail emphasizes the natural grain of the pine wood too. The wood strips do look a little awkward, will have it back in full length next time.
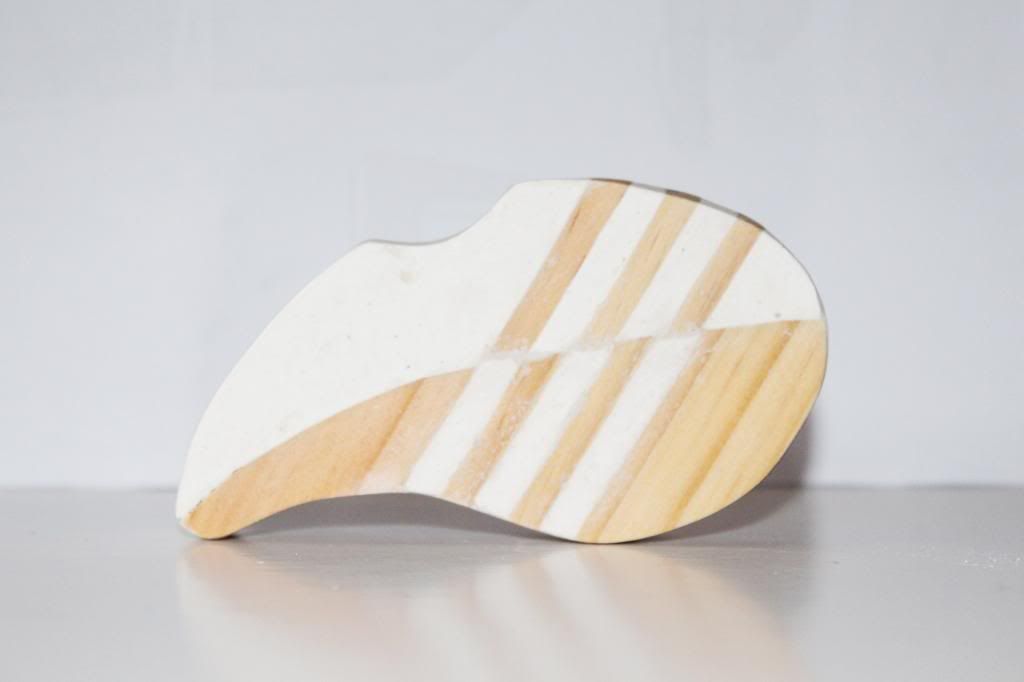
 Really like how this one turned out. The two materials instead of clashing are integrated together well, the overall form looks clean and harmonious. This will be the template for my final object.
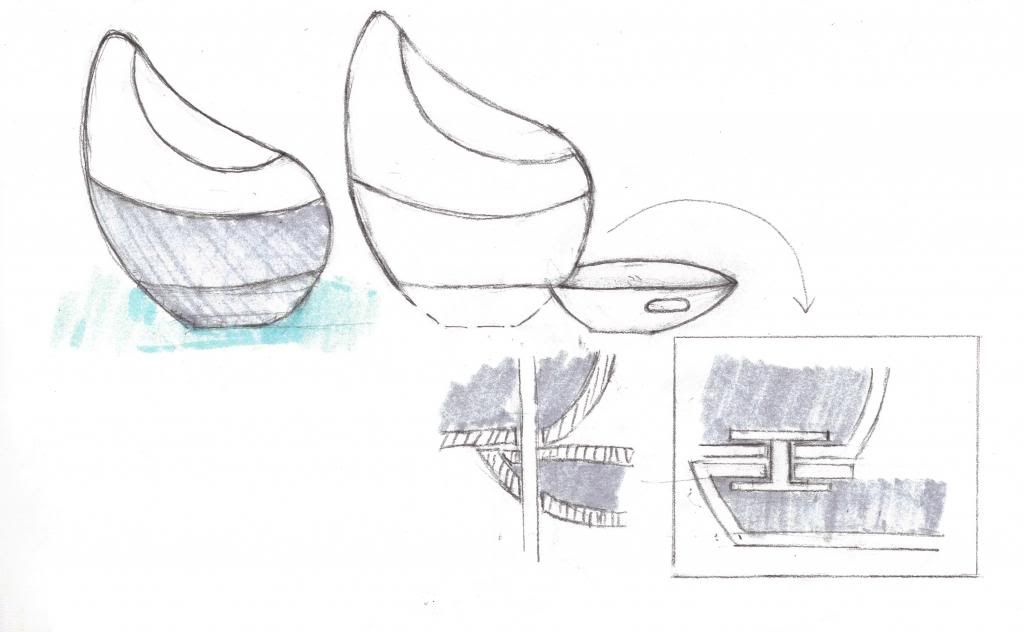
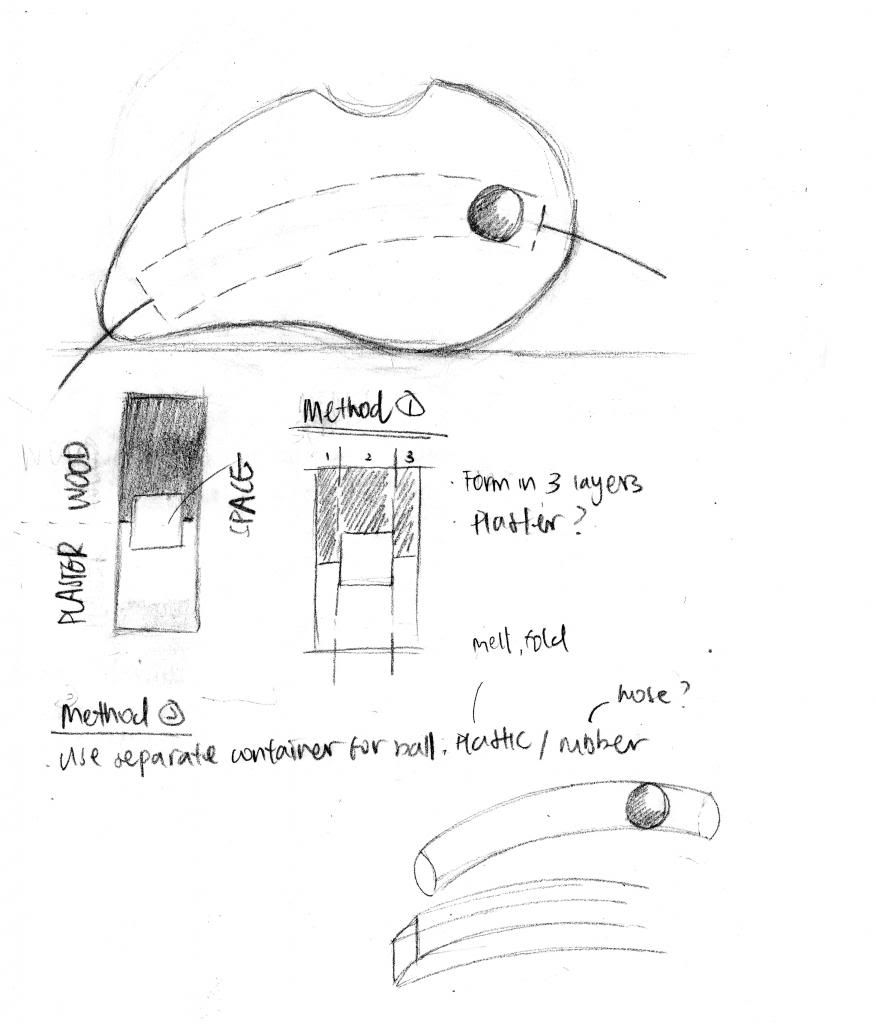
Forgot about taking pictures of how I created space for the ball bearing to move inside the object. Nothing too complicated was done. I stuck a short piece of straw for the ball to run along onto the curvature of the wood before casting the plaster. Both ends of the straw was also sealed shut with tape to ensure no plaster gets in.
To improve on for final:
1. Get a perfect curve running across the center in regards to the part with the different strips of materials.
2. Find ways so that the plaster and wood does not split after casting. May need to make the tip (left) less narrow.
3. Reduce transfer of plaster onto the surface of the wood so as to retain it natural warm colour: cover surface of wood with plaster before casting.


Labels: dsdn141
 Back to basics after the previously failed idea. Keeping the entire form looking simple and clean is never a bad idea. Decided that I like the look of natural pine wood with the plaster, so instead of finding ways to emphasize the contrast between the two different materials as I tried before, I will be using a pattern to harmoniously integrate the two materials together.
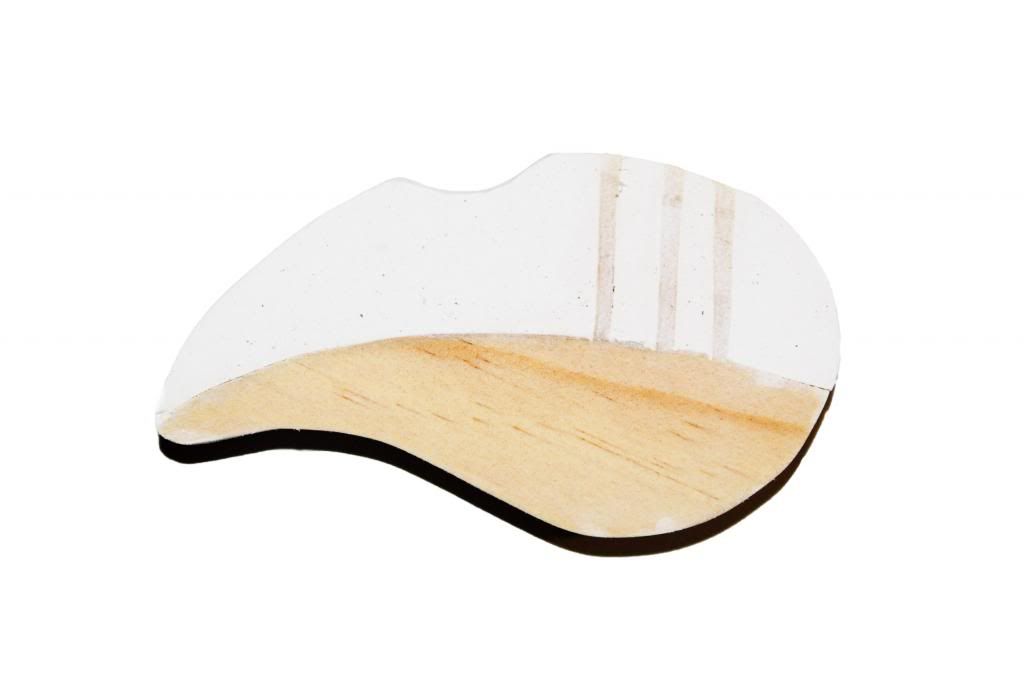 Extented strips of wood into the plaster to reflect the idea of integrating. Although the strips look too thin, does not quite stand out enough.
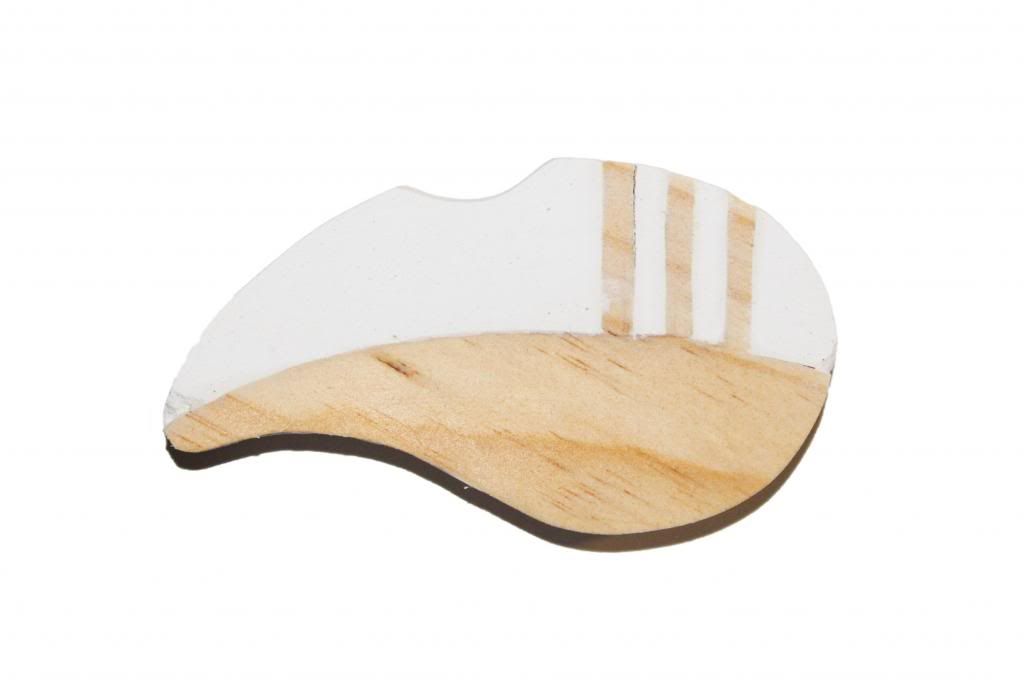 Of course I had to make another one with thicker strips of wood incorporating with the plaster. Looks about right, but still a little boring. More brainstorming needed.
Labels: dsdn141
Labels: dsdn141
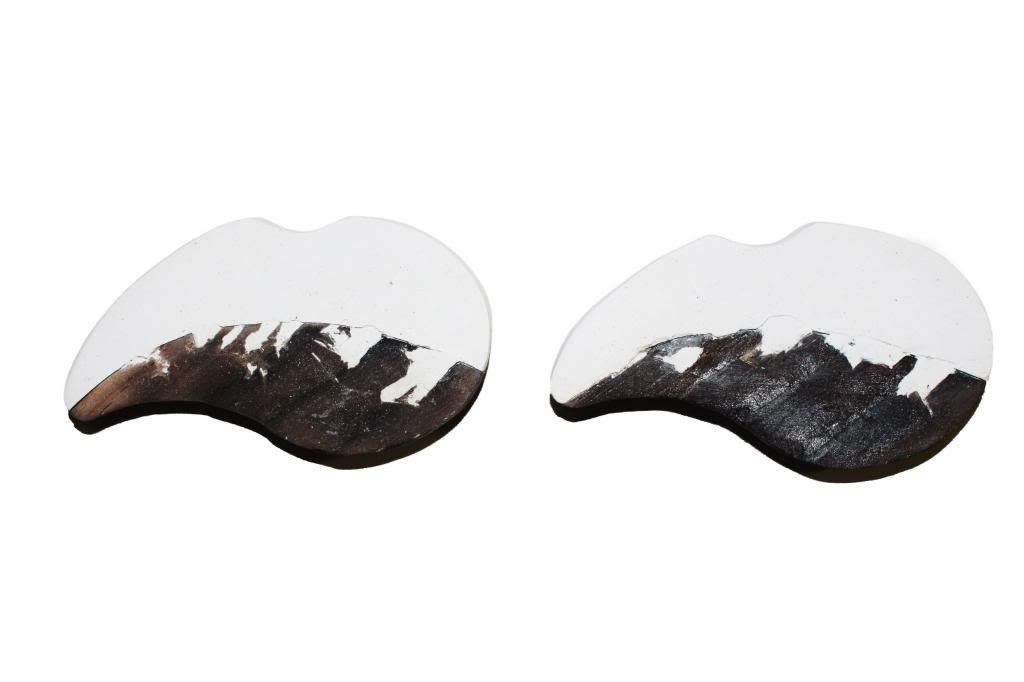 Tested out incorporating the effect I used in project one onto my object (ie. burning and then chiseling/ destroying the wood). Did not turn out as I hoped it would. The blackened surface transfer really easily and sticks to the surface of the plaster, especially after sanding the moulded form, resulting in an uneven colour on the wood and greyish coloured plaster. It was also quite hard to get the plaster to adhere to the chiseled wood surface, even more so for some parts where the space is quite shallow. Makes the plaster break away easily too (as seen in some parts in the photo).
It turned out very messy and dirty looking instead of the natural effect I was hoping for. Moving on to another idea..
Labels: dsdn141

Mould for casting the form.
However, after the first casting I decided that if shifting the concave portion a little further to the front will allow the object to sit more comfortably into a hand. So a new mould will have to be made. Also trying to figure out a way to allow my object to be removed from the mould easier, it takes so much force to remove each time. Vaseline does not seem to be helping too much. I am thinking about making some cuts to give the plastic more room to bend.
Labels: dsdn141
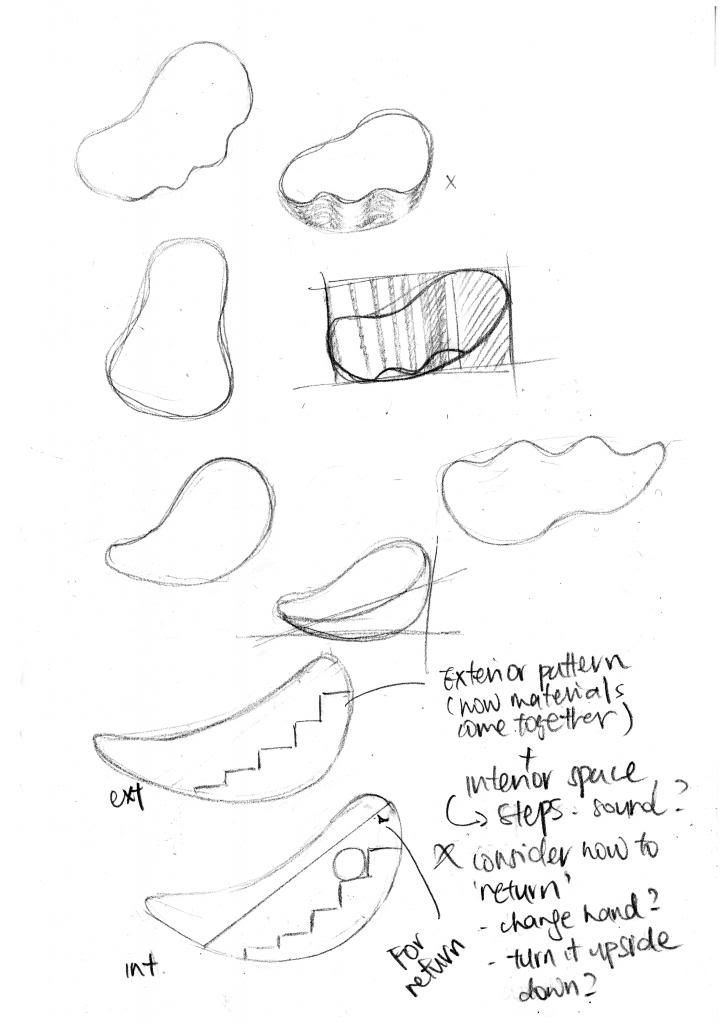
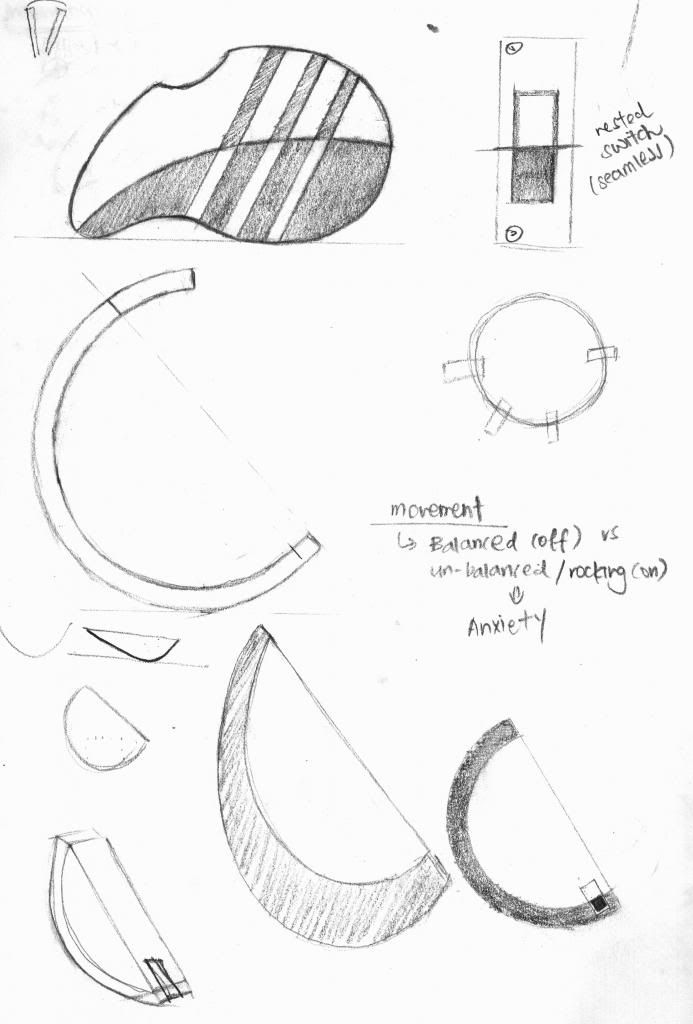
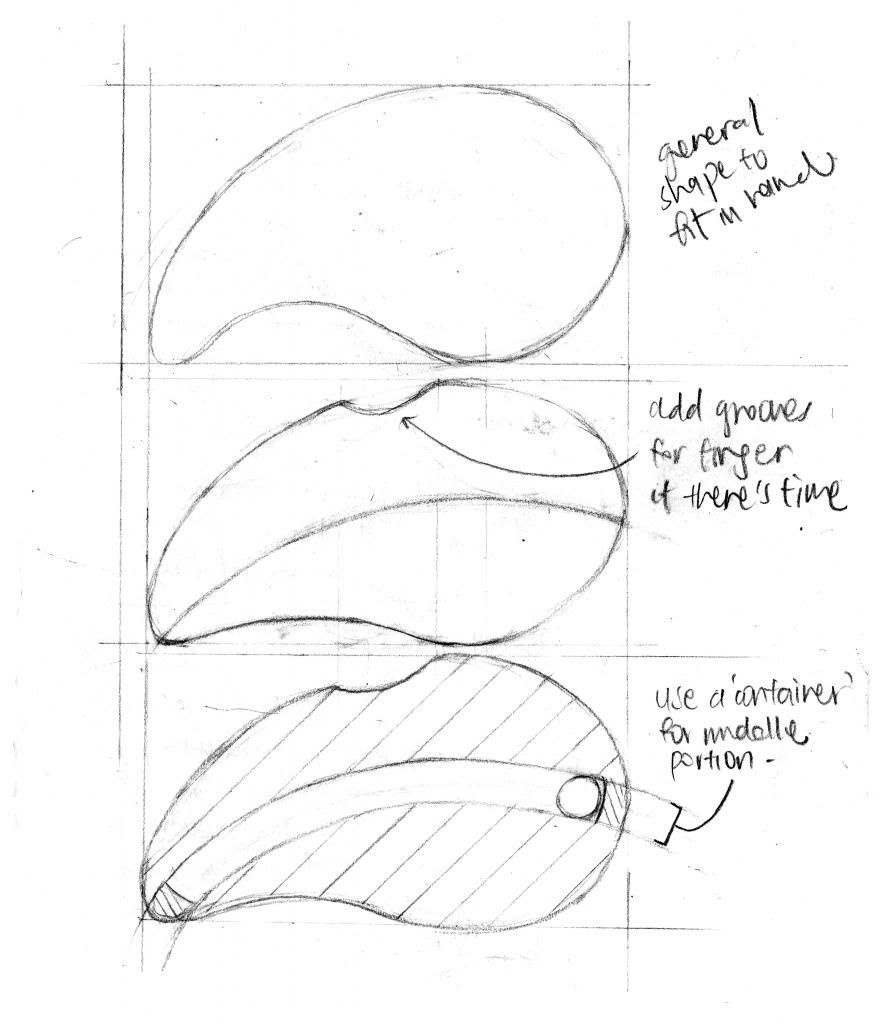
1// Exploring general shape and form of the object.
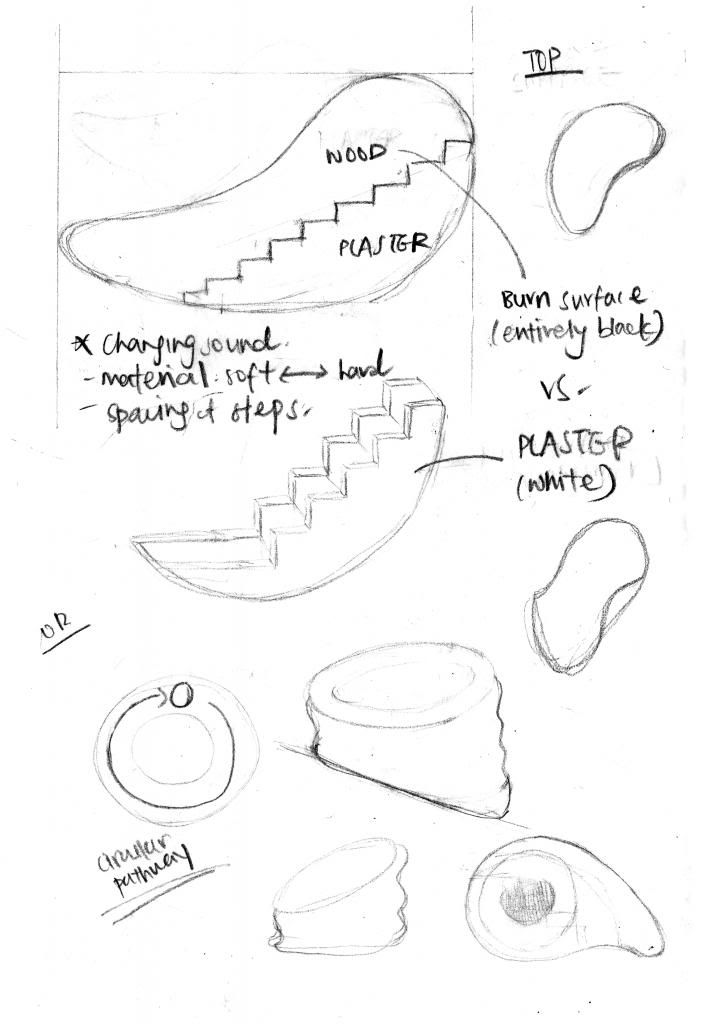
2// Narrowed down on the shape I wanted to focus on and then I explored ways to integrate my tow materials (Wood and plaster) into the shape. For the interior space containing the ball bearing, I wanted to incorporate some steps going diagonally across the form. This will hopefully produce an interesting rhythm and sound when the object is tilted.
3// Zeroing in on the exact shape of my object. I decided to not use the idea of 'steps' because it created more problems in terms of physically creating it. So I simplified everything and instead put more focus on the connection and pattern. The interior space is changed into a curve going across the form which will be reflected visually on the surfece of the object through the transition in materials.
4// Figuring out how to create the space to fit the ball bearing in the casting process.
Labels: dsdn141
For my tile, I focused on revealing the look and feel of what we would expect from wood in its most natural state. Since the wood that I bought was really processed and smooth in the first place, on one end of it, I intensified that characteristic through heating it as much as possible to obtain an evenly blackened and glossy surface. On the contrasting end, a chisel and hammer was used to reveal a rough and more organic surface, replicating how wood would naturally look like. In this project, I realised the importance of experimenting instead of visioning what would happen because more often than not, the result was different from what I expected. Eventually I made the most progress when I approached the project ‘blindly’ during the period of experiementation.
Labels: dsdn141

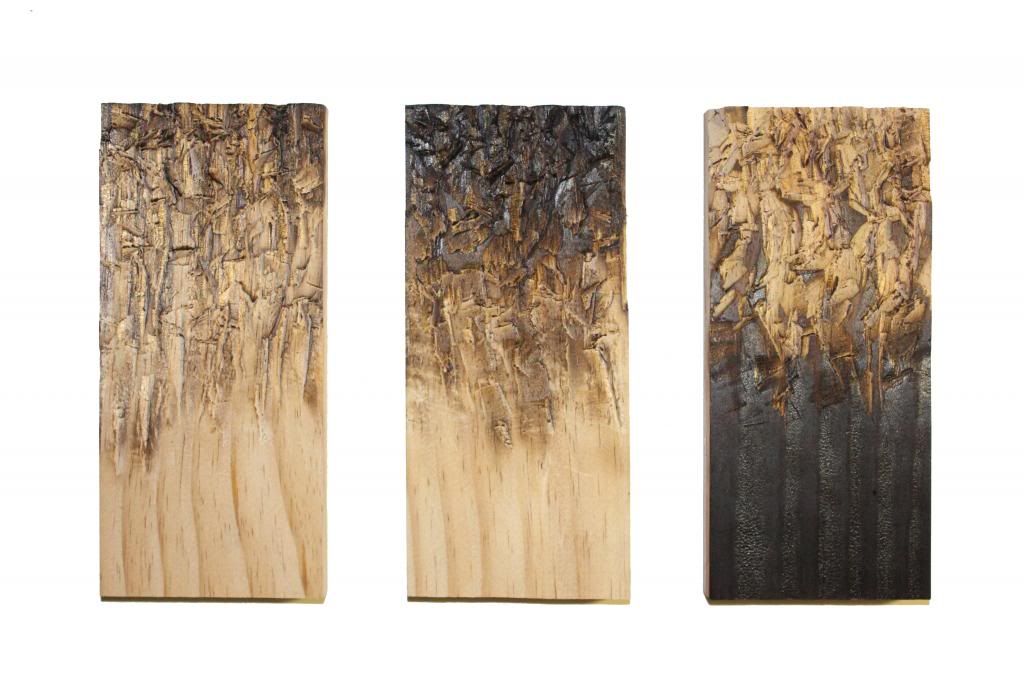
From left to right:
1. Represents the transition between a rough surface to a smooth surface.
2. Represents the act of applying force to cut through the manufactured surface to reveal its natural one.
3. Represents the removal of the burnt surface.
Labels: dsdn141
0 comments / + add comment